While you’re adding new media or content to your website, suddenly, you see a warning that says, “Fatal error: Allowed Memory Size Exhausted.” What exactly occurred then? What caused WordPress to run out of memory? Ultimately, it all comes down to PHP. As your WordPress site incorporates more interactive and multimedia elements, you can exceed the PHP code’s default WordPress memory limit.
You can resolve these problems by contacting your host for assistance in reconfiguring WordPress. You can edit your site’s files if you’re comfortable doing so. How do you get started? Don’t worry; we’ve got you covered. Our primary goal here is to explain how to increase WordPress memory limit and why it matters for your website. Let’s dive in.

What is the PHP Memory Limit in WordPress?
WordPress uses PHP server-side language to generate and manage your website’s HTML pages. As the name implies, it runs on the WordPress backend instead of your desktop or mobile device.
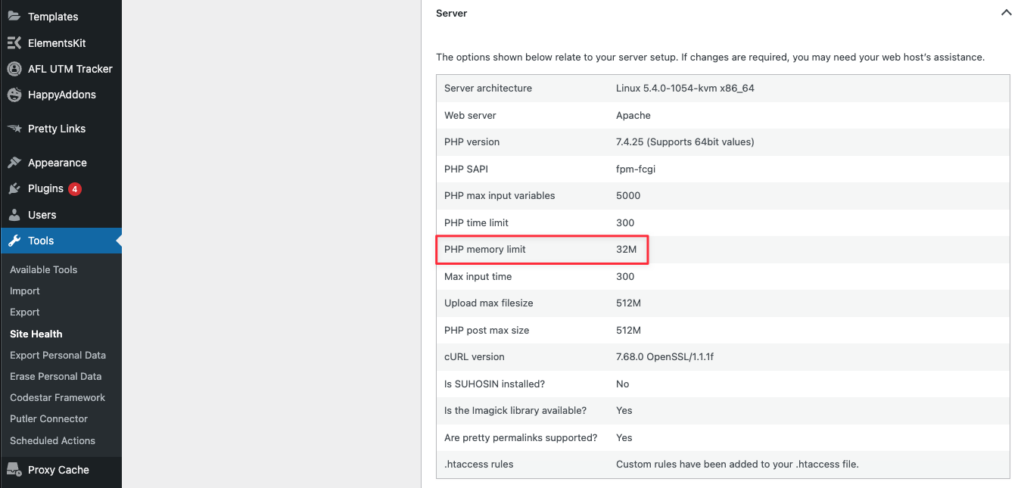
This compact, fast and open-source language works well for creating website elements. Programmers can customize PHP frameworks to meet particular needs, and the code is frequently updated to improve security and functionality. By default, WordPress’ memory limit is 32MB. The system works fine if you only have a few pages, a few plugins, and limited multimedia content however, if you add more, the memory usage spikes and can get close to WordPress’s maximum memory limit.

When the memory limit is exceeded, WordPress increases memory limit to 40MB for single-site installations and 64MB for multi-site installations automatically. If you continue exceeding the limit, you will receive the error message mentioned earlier and can not add new content. Therefore, you should resolve these issues to add new content to your website.
Why does WordPress Need More Memory to Get Started?
Increasing the memory limit involves changing the maximum upload size in WordPress’ wp-config.php file. You should, however, exercise caution with one thing. An increase in the memory limit will make it harder to detect WordPress inefficiencies.
Before increasing the WordPress memory limit, you should find out what is using more memory. Upgrades to hosting usually cost more in the long run when you throw more resources at a problem.
Updating your hosting server’s PHP with the latest version would allow WordPress to run more efficiently and not require more memory. The inefficiencies of WordPress may lead to a slow website and a poor user experience. It’s essential to pinpoint the problem’s source to prevent it from happening again.
PHP updates on your hosting server would improve WordPress’ performance and reduce memory consumption.
The Best Ways to Increase the PHP Memory Limit in WordPress
After updating your PHP, removing subpar plugins, and cleaning up your material, you may still have memory issues. In this case, you should increase the WordPress memory limit.
The following methods will help you achieve this goal:
Edit your wp-config.php File
If you’re comfortable with tech skills, you might want to try editing the wp-config.php file.
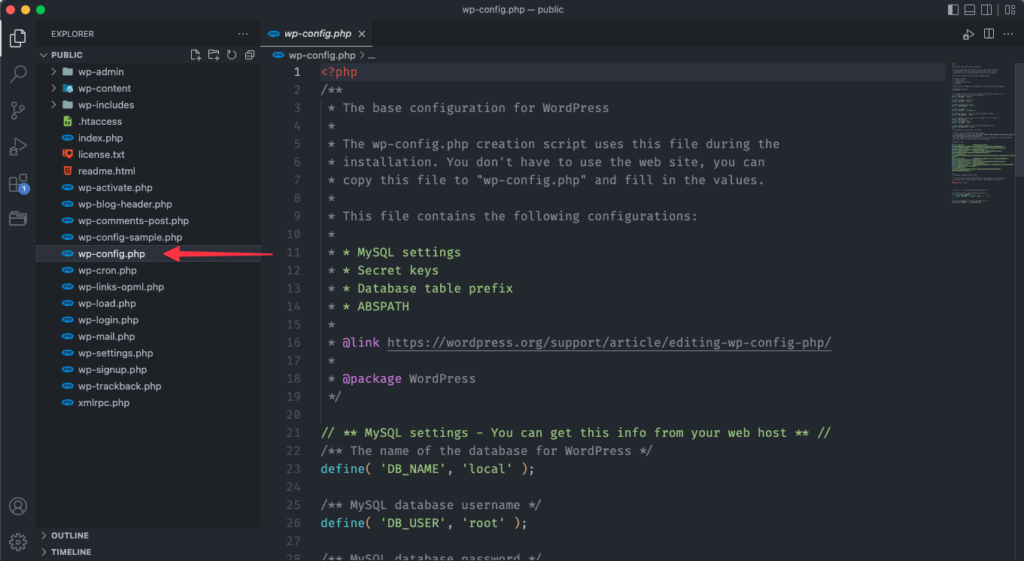
What’s first? Let’s get started. Access your WordPress files using a file transfer protocol (FTP) or SSH file transfer protocol (SFTP). Your results may vary depending on the solution you choose, but they should look like this:

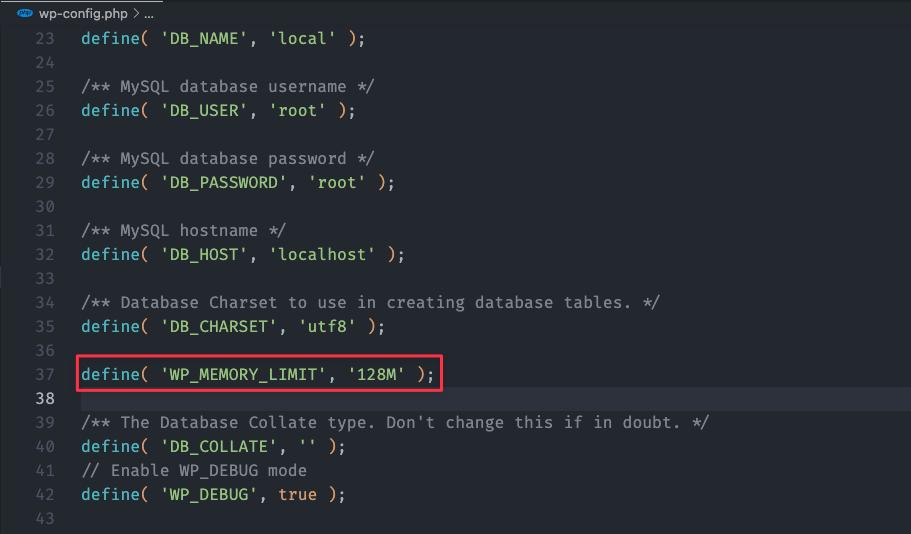
Find this line to edit the memory limit:
define('WP_MEMORY_LIMIT', '32M');Increase the second parameter to change it. We previously stated that PHP memory limits of 128M should be sufficient. If you do not find this line, just copy the code below and paste it into wp-config.php file
define('WP_MEMORY_LIMIT', '128M');
After saving the file, you’re done. It might be necessary to boost it once more if the fatal error persists. Ensure you don’t overdo it, as it could crash your server. It will help if you ask your host for assistance.
Edit your PHP.ini File
If you can’t fix the problem by editing wp-config.php, you’ll have to deal with it through your server’s settings.
When using shared hosting, you cannot view your PHP.ini file. If you have access to PHP.ini, it’ll be in the root folder, although your host might have it somewhere else.
You can increase your WordPress memory limit and upload limit by following these steps:
- You need to locate your php.ini file. If you cannot locate it, create your PHP.ini file and save it to the root directory of your WordPress installation.
- Open and edit the php.ini file using your code editor.
- Find the line stating.
'memory limit = 32M'. - You will need to adjust the
32Mother numbers to the desired limit (for example, 256M or 512M). - Save your changes, then restart your server or local host.
If you have made your php.ini file, add the following line to it:
memory_limit = 256M (or 512M)
max_execution_time = 180
Additionally, changing the max_execution_time line is a good idea. This line specifies the run time of PHP scripts in seconds. PHP generates an error if the time limit is exceeded. If you use memory-intensive services and plugins, increasing this number will allow your scripts to run longer.
Edit your .htaccess file
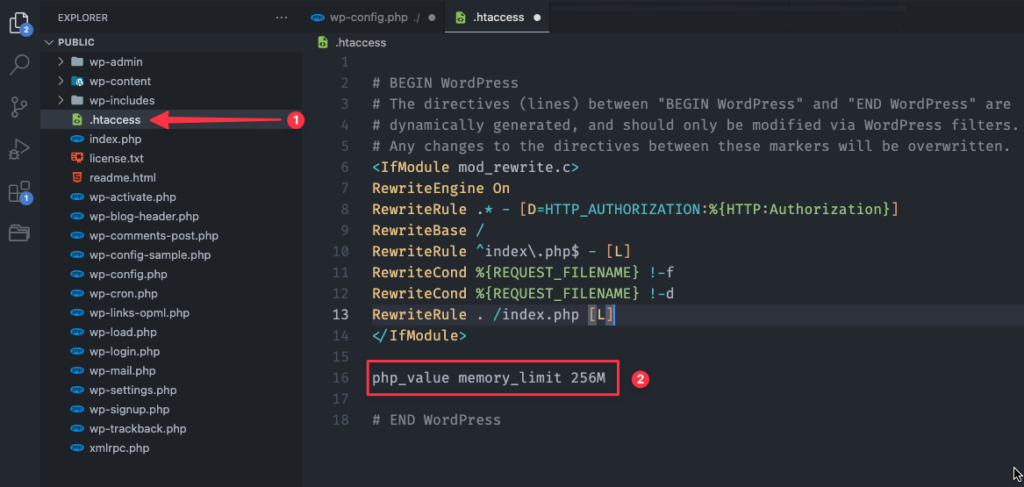
If you do not have access to PHP.ini, you will need to modify your .htaccess file. It is a secret file, so the .htaccess starts with a mark. Your SFTP file manager might have hidden some files you don’t see in your root folder.
To increase the WordPress memory limit, you must include the following information in your .htaccess file:
Upon accessing the file, you can find the following line:
php_value memory_limit 256M
Add the value you need – 64M, 128M, or 256M – and save it.
Get in Touch With your Hosting Provider
You can increase the WordPress PHP memory limit by contacting your hosting company. If you own a shared, dedicated, or virtual private server, this might be a simple remedy, or it might not be offered.
Final Thought
Handling fatal errors associated with increasing WordPress memory limit is stressful. The process depends heavily on your chosen hosting provider, so finding a trustworthy host is crucial. You can make the necessary changes to the settings with their help. Increasing the WordPress memory limit in the wp-config file is the fastest way; the other two can be a little more tricky.

