Finally, we’ve added the “payment plans,” the most requested feature of the bayna plugin.
Add Payment Plan for WooCommerce #
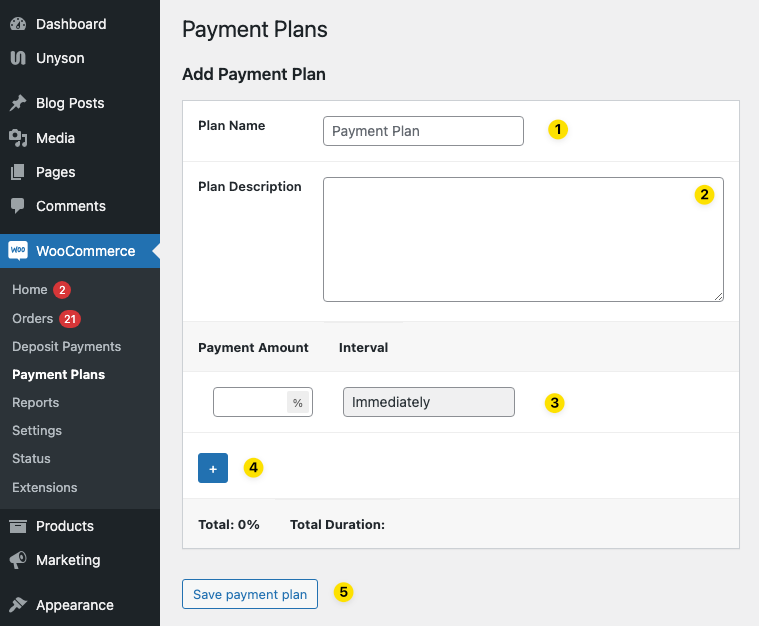
To add a plan, go to the menu WooCommerce > Payment plans.
- Plan Name: The name that will be displayed to the customer when viewing the plan.
- Plan Description: The description that will be shown when a plan is clicked or displayed by default.
- Payment Amount: Immediate charge of the specified percentage when the first order is placed.
- Add a new schedule by clicking the [+] icon.
After clicking the plus icon [+], add the payment amount, interval, and interval unit. These fields are required to save the payment plan.
5. Click “Save payment plan” to save the plan data.
Existing payment plans #
On the payment plan page, you will find a list of all the existing plans on the right side of the screen. This feature allows you to easily manage your plans by providing options to edit or delete any plan according to your preferences. 
Edit Plan #
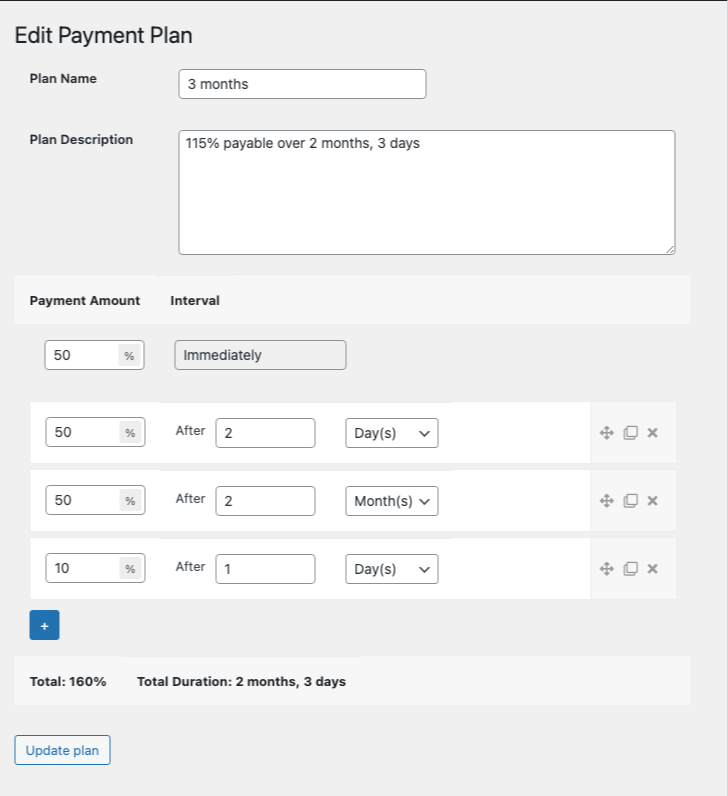
To modify the data associated with a specific plan, simply click on the “Edit” link located next to the plan name. After making the necessary changes, be sure to click the “save” button to ensure that your modifications are applied. Additionally, ensure that all the details of the options match what was outlined in the “Add Plan” section above.
Usage #
We are developing a product-level plan, which will be released shortly after thorough testing and quality assurance.
Currently, the payment plan is exclusively accessible in checkout mode, utilizing a cart-based deposit system.
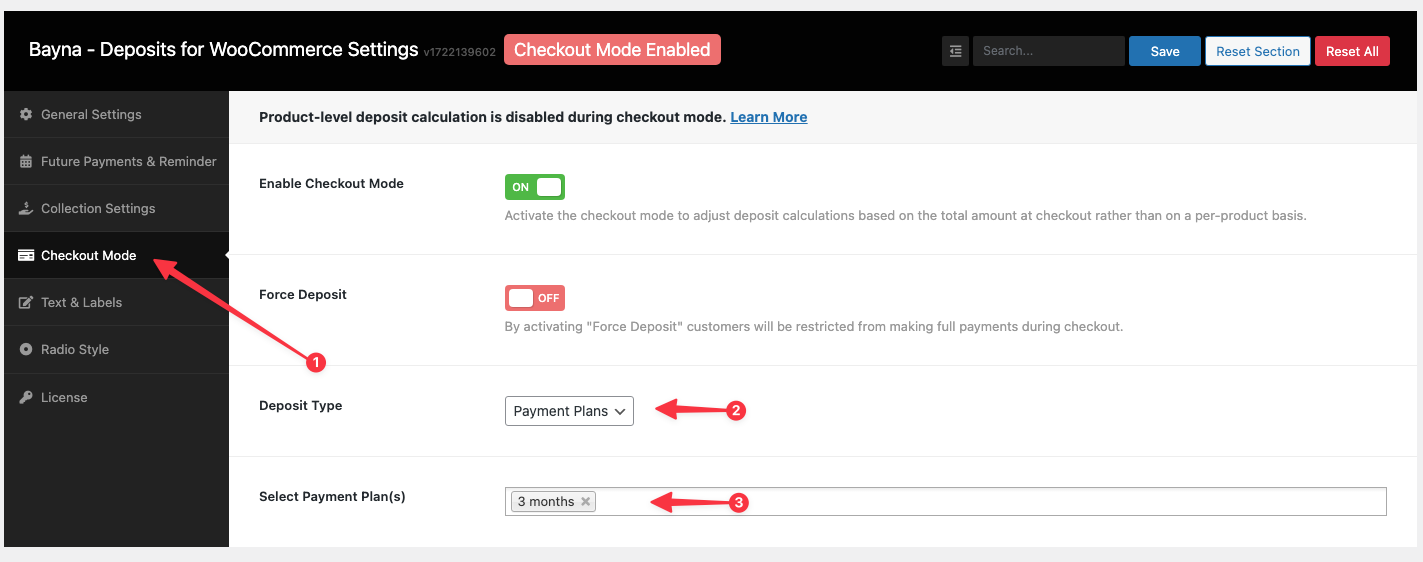
 Go to Codeixer > deposit settings > Checkout mode.
2. Deposit Type: Select “Payment Plans”
3. Select Payment Plans(s): choose the payment plans you want to display to customers.

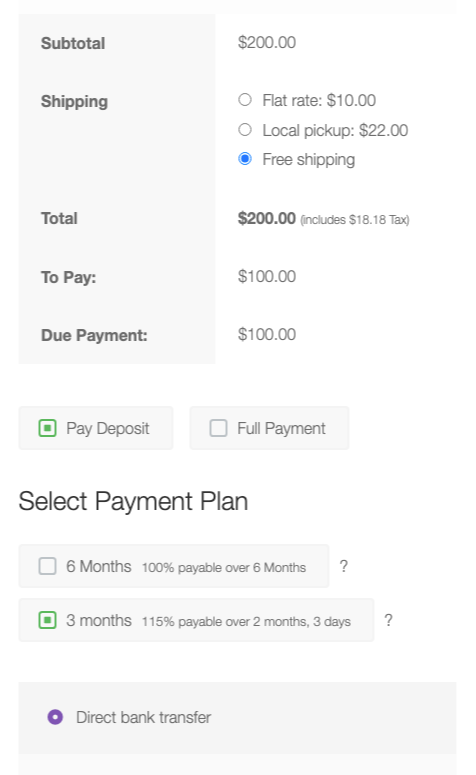
The deposit payment plans are now visible to customers on the checkout page.


